Nape Surface Piercings

Nape Surface Piercing

Nape Surface Piercing

Nape Surface Piercing Flush

Nape Surface Piercing Flush

Here are a couple of surface piercings on the nape of the neck. I always pierce these with 1.6mm PTFE plastic w/titanium balls to allow flexibility and initial comfort for the inevitable swelling. A few weeks after your pierced, maybe a month or so depending on your own healing process; return to the studio and I’ll trim/cut the plastic bar down flush. You can also change the heads or balls, though I recommend a 4/5mm ball minimum for the first few months.

Tongue Piercing

Tongue Piercing

Tongue Piercing

Here’s a tongue piercing from a couple years back. With tongue piercing, it isn’t always possible and a consultation prior is necessary to detect the vein make up of your tongue. If it is possible, I always pierce with a 1.6mm x 20mm titanium bar. Your tongue will swell immediately (tongues swell, pierced or not pierced) and you can expect some discomfort for several days. Within the first two weeks you will see swelling, probably be on liquid foods and occasionally people pick up a temporary lisp. Return in a minimum of two weeks for a shorter bar change down as part of the service. This photo was taken after the second bar was fitted.

Diath Piercing

Diath Piercing w/CBB

Diath Piercing w/CBB

Here is a diath piercing which was pierced with a 1.2mm x 8mm CBB. Ironically this is one of very few ring only piercings by myself, as it’s just not advisable with a bar. If the swelling is too much for a bar it can loosen a ball or both, potentially falling into your ear; that’s probably not good. I’ve also pierced them with bars in the past and found them incredibly tricky to complete as there’s not much room on the average diath up top to get your finger tips in . Again, it’s the type of piercing that is not always possible or available for everyone (depending on your ear) but this is a picture whereby it’s perfectly pierced. I quite like doing them as they are a bit tricky and I think they look really kool.

Inner Pinner/Forward Helix Piercings

Inner Pinner/Forward Helix

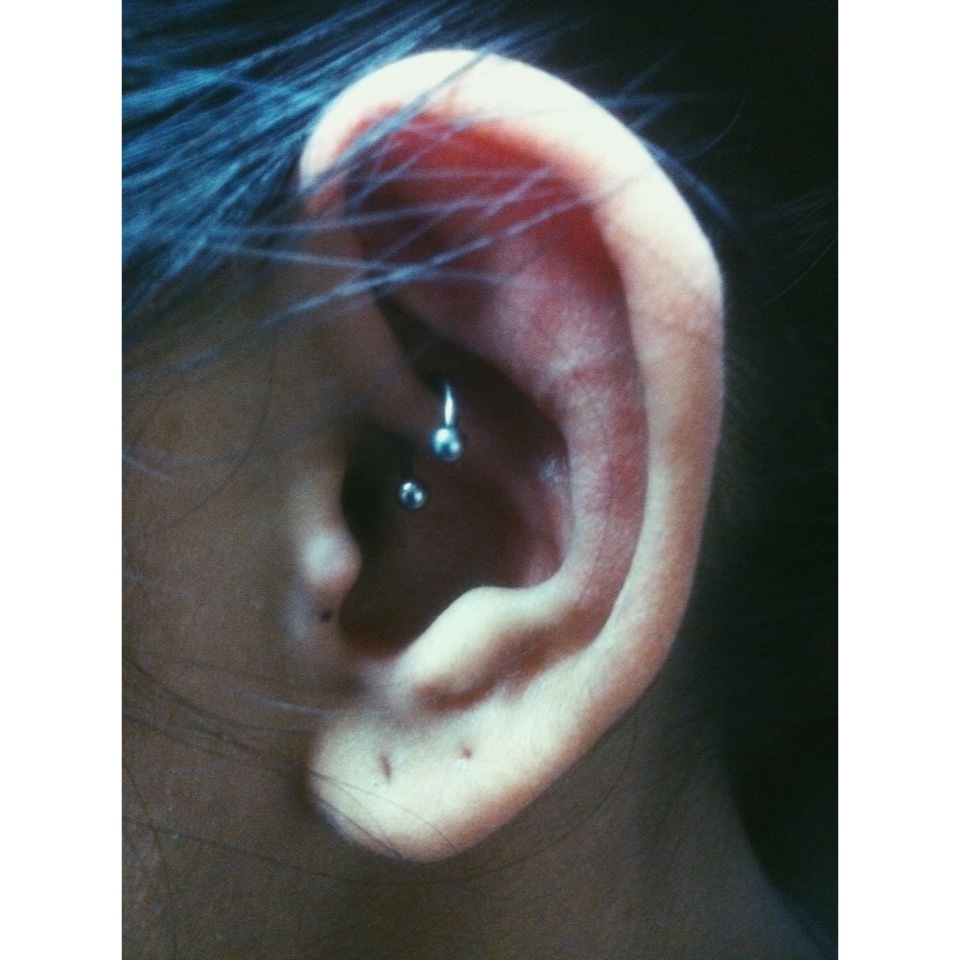
Forward Helix/Inner Pinner ~ Red Light, Green Light w/room for Yellow Light (and a mark up of how a diath would look.)

Among this collection of piercings located on the left side are two inner pinner piercings pierced by myself. The inner pinner or forward helix, is located towards the front of the ear and it is quite common I get a request for three at once but due to swelling and healing I will only ever pierce two at a time regarding an inner pinner. As you can see in this picture, I will mark up for how it will look with three (note the dot between both bars) so you can decide which way round to get them done if three is what you eventually want. I usually pierce these with either a 1.2mm x 8mm or 10mm straight bar (as seen here) or a flat back labret bar. When fully healed, as it’s such a thin area a 1.2mm x 6 or 4mm bar/labret looks awesome but they can take a few months to heal; especially if you get two pierced at once! There is also a blue line slightly lower, underneath the second bar. That was because this lady also was considering having her diath pierced.

Rook Piercing

Rook Piercing w/ 1.2mm X 8mm curved bar,

Rook Piercing w/ 1.2mm X 8mm curved bar,

The Rook is another piercing I really like doing as it’s quite discreet and tucked away thus healing is usually easier with regards to catching it on things such as hair, hats, scarves etc. This rook is pierced with a 1.2mm X 8mm curved titanium bar.